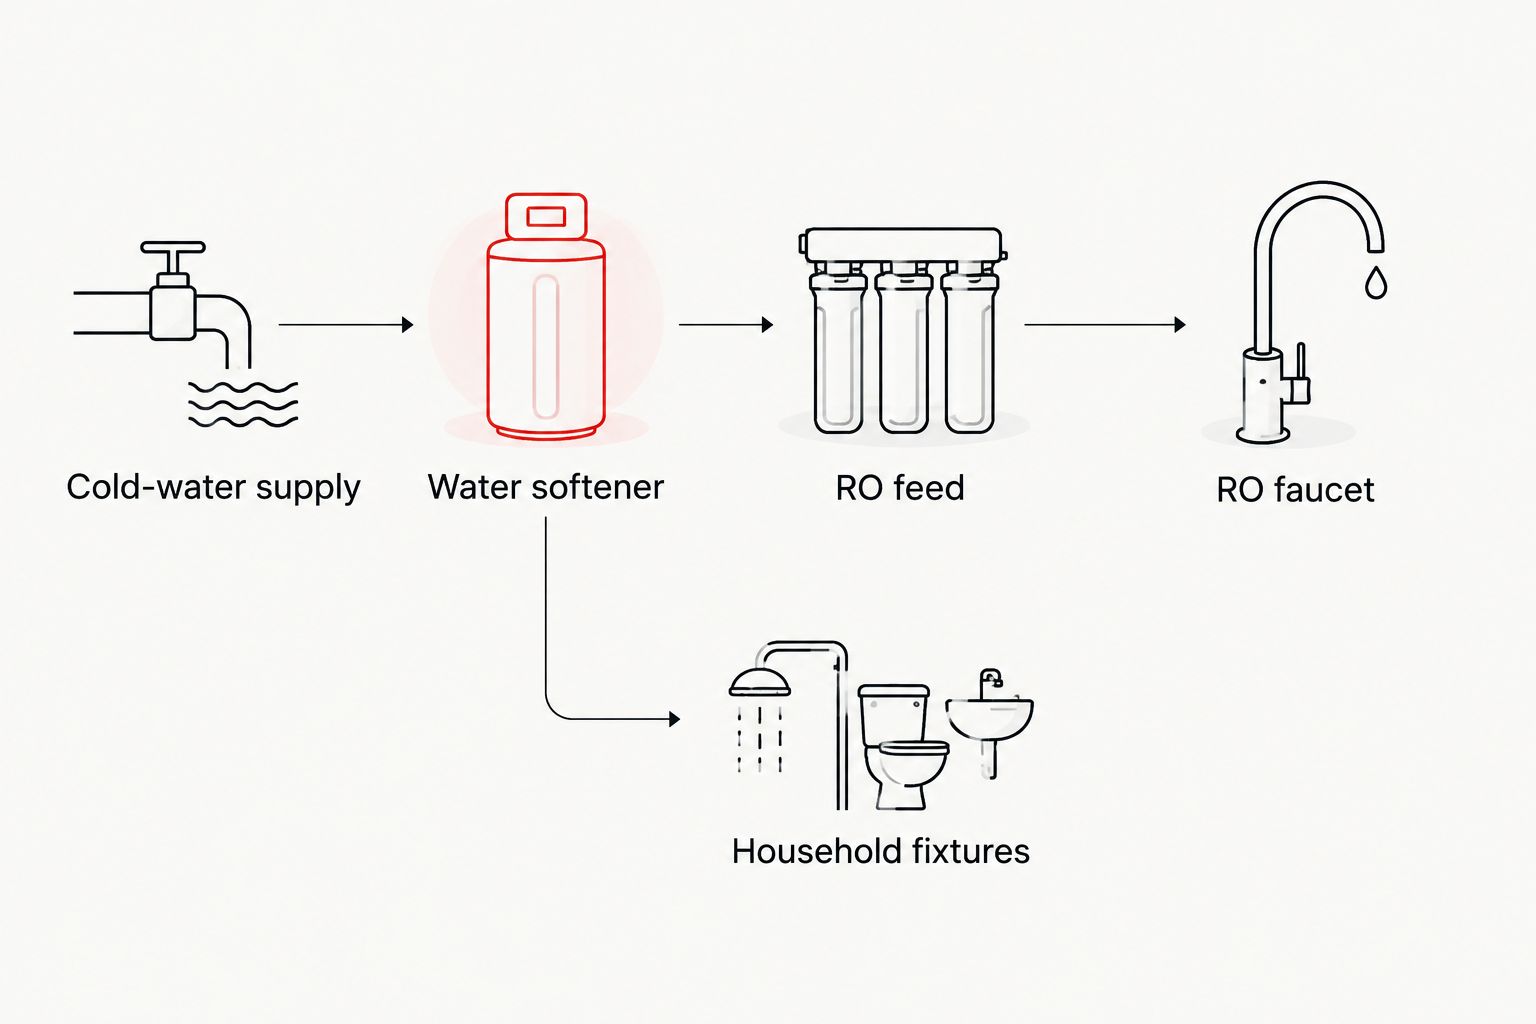
Instead of treating hard water and drinking water as separate plumbing projects, connect your water softener reverse osmosis system combo in this order: cold-water supply, softener, then a softened-water branch feeding the RO unit. Keep the softener’s regeneration drain separate from the RO reject-water tubing, and follow both manufacturers’ installation instructions.
- A water softener reverse osmosis system combo puts the softener upstream of the RO feed.
- Water softening reduces hardness; reverse osmosis treats drinking water at a separate faucet.
- Priority Rooter & Plumbing is a licensed plumbing option for Tucson homeowners who need installation help.
- Confirm feed pressure, drain requirements, and tubing compatibility before connecting either system.
Why this matters
A water softener and an RO system do different jobs. A conventional ion-exchange softener removes calcium and magnesium by exchanging them for sodium or potassium; reverse osmosis uses a membrane to reduce dissolved substances in drinking water.
Softening is not a substitute for drinking-water treatment, and RO is not a replacement for whole-house softening. Feeding compatible RO equipment with softened water reduces the hardness reaching its membrane, but it does not eliminate filter changes or sanitation.
Priority Rooter & Plumbing serves residential and commercial plumbing customers in the Tucson metro area. This 2026 guide explains the connection sequence, the checks that prevent installation mistakes, and when the work needs a plumber.
What each treatment stage contributes
| Treatment stage | Best for | Main benefit | Limitation |
|---|---|---|---|
| Water softener | Reducing hardness throughout connected plumbing | Removes calcium and magnesium through ion exchange | Does not disinfect water or remove every dissolved contaminant |
| Under-sink reverse osmosis | Treating drinking and cooking water | Reduces substances covered by the specific system’s tested claims | Produces reject water and needs filter and membrane maintenance |
| Softener feeding RO | Combining household softening with drinking-water treatment | Keeps hardness treatment upstream of the RO membrane | Adds equipment, drain connections, and separate maintenance tasks |
For a 2026 installation, choose equipment against your water conditions and its documented treatment claims—not a generic promise of pure water. A dissolved-solids reading alone cannot establish whether water is safe to drink.
Before you start
- Collect both installation manuals and the correct materials. You need an accessible cold-water connection, compatible potable-water fittings and tubing, working isolation valves, the specified RO faucet and drain components, and any required electrical supply.
- Verify water conditions and equipment limits. Check supply pressure, hardness, and any other feed-water limits listed by the manufacturers. Confirm local installation and backflow requirements before modifying plumbing; an under-sink RO unit is not automatically suitable for whole-house use.
- Trace the kitchen cold-water branch. The non-obvious problem is an unsoftened kitchen line: installing a softener does not prove the RO feed receives softened water. Locate the actual branch before cutting or connecting anything.
Stop if you cannot identify the pipe routing, isolate the supply, or establish a compliant drain connection. Priority Rooter & Plumbing provides residential plumbing repair and installation; use professional help rather than guessing at concealed piping.
Cold-water feed and softener routing
Establish the treatment order
- Trace the supply. Identify the incoming cold-water line, the softener location, and the branch intended to feed the RO system. Leave outdoor irrigation and other intentionally untreated branches outside the treatment path where the plumbing design requires it.
- Isolate the work area. Close the appropriate water shutoff and relieve pressure at a suitable cold-water fixture. Protect the cabinet and floor before disconnecting existing plumbing.
- Connect the softener correctly. Follow the unit’s inlet and outlet markings and its bypass assembly instructions. Reversed connections are not an acceptable shortcut, even if water still reaches a faucet.
- Identify the softened branch. Confirm that the intended RO connection sits downstream of the softener outlet. Use a hardness test suitable for your water to compare the untreated supply with the proposed RO feed.
- Record the baseline. Write down the test results and supply pressure, including the test date in 2026. Keep those readings with the equipment manuals for later troubleshooting.
Expected result: You have 2 treatment stages in sequence, with 1 softened-water supply branch feeding the RO unit. The bypass operates as instructed, and the RO feed is not accidentally connected to untreated water.
Do not assume nearby pipes serve the same branch. A kitchen supply can follow a different route from the bathroom or laundry plumbing, especially after alterations.
RO feed, faucet, and storage connections
Connect the drinking-water side
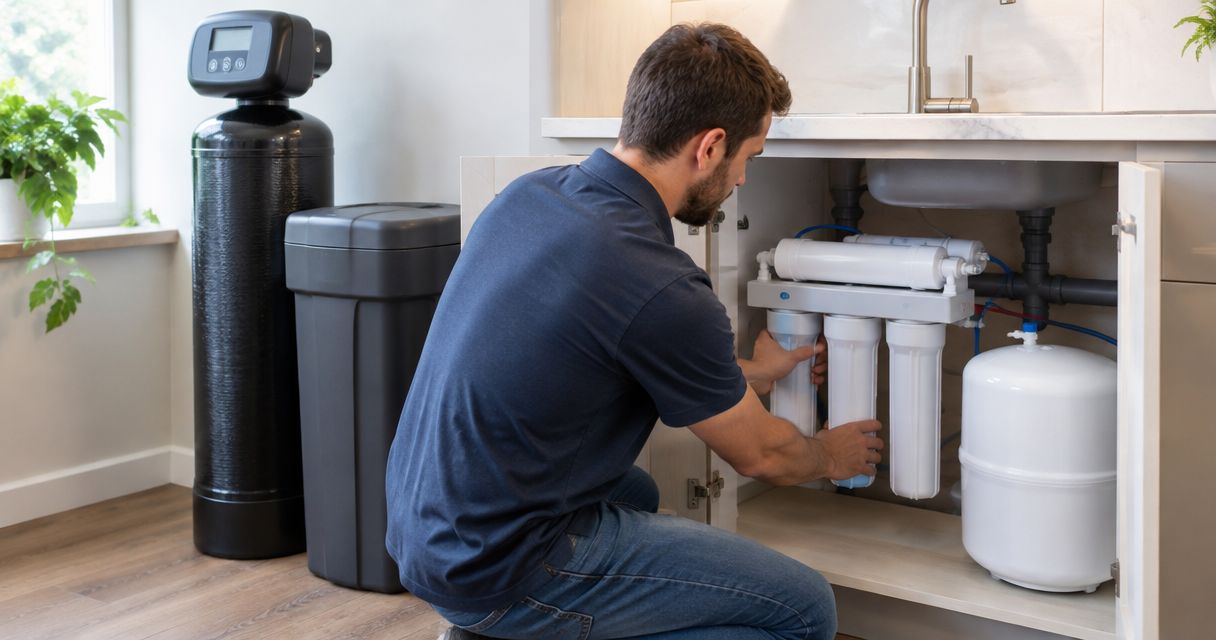
- Position the RO assembly. Leave access for cartridge changes, tubing removal, and leak inspection. Support the assembly using the mounting method specified by its manufacturer.
- Install the feed connection. Use an approved connection compatible with the softened cold-water supply and the RO tubing. Do not connect the RO feed to the hot-water line.
- Route the tubing. Cut tubing square with the appropriate tool and make connections exactly as instructed. Keep the tubing away from sharp edges, hot surfaces, cabinet hinges, and stored objects that can crush it.
- Connect the faucet. Install the supplied or specifically compatible drinking-water faucet using its instructions. Follow the manufacturer’s routing diagram rather than matching tubing by color alone.
- Connect storage where applicable. For an RO system with a storage tank, connect the tank and its valve as directed. A tankless system follows a different layout; do not add a tank unless the manufacturer supports it.
- Check every connection. Confirm tubing engagement, locking components, seals, and required support before admitting water. Do not use thread sealant on connections that seal through a compression ring or O-ring unless instructed.
Expected result: The RO unit receives softened cold water, and its drinking-water outlet reaches the correct faucet through the specified components. Every connection remains accessible for inspection.
For your 2026 equipment check, use the manual for the exact model—not a diagram for a similar-looking unit. Tubing colors, port positions, flushing procedures, and storage arrangements are not universal.
Separate drains and startup checks
Complete the waste connections and commissioning
- Identify both waste streams. The softener discharges regeneration wastewater; the RO system discharges reject water during production. Keep these 2 drain lines distinct and follow each manufacturer’s drainage requirements.
- Provide approved drainage. Use the required air gap or other approved arrangement for each connection. Do not push treatment tubing directly into a sewer opening or improvise a shared connection that permits wastewater to back up into equipment.
- Position the RO drain connection. If the approved installation uses an under-sink drain adapter, follow its placement instructions and applicable plumbing requirements. Do not attach it to an arbitrary section of drainpipe.
- Commission the softener first. Follow its startup, rinse, and regeneration instructions before supplying the RO system. Confirm that the outlet water meets the RO manufacturer’s feed requirements.
- Sanitize and flush the RO system. Use the exact procedure supplied with the equipment. Discard startup water as directed; there is no universal flushing volume or number of tank fills.
- Inspect under operating conditions. Check the feed adapter, treatment connections, faucet, tank connection where fitted, and drains. Recheck after the system has produced water and reached its normal shutoff condition.
Expected result: Both systems operate without visible leaks, their drains function correctly, and the RO system completes its prescribed startup procedure. Record the commissioning date in your 2026 maintenance notes.
Do not combine the softener drain and RO reject line just to save space. Their discharge conditions differ, and an improvised connection creates a route for backflow or drainage problems.
Add refrigerator water after the RO system
A refrigerator connection is an adjacent workflow, not an automatic part of the installation. First confirm that both the refrigerator and RO manufacturers permit the connection and that the RO system can meet the appliance’s supply requirements.
- Check the appliance requirements. Compare the refrigerator’s required inlet conditions with the RO system’s documented delivery conditions.
- Locate the approved product-water connection. Follow the RO manufacturer’s layout for adding an appliance branch. Never connect the refrigerator to reject-water tubing.
- Install compatible tubing and isolation. Use potable-water components suitable for the route and protect tubing where it passes through cabinets.
- Follow refrigerator filter instructions. Keep, replace, or bypass the refrigerator filter only as its manufacturer directs.
- Test both outlets. Check the drinking-water faucet and refrigerator dispenser, then inspect for leaks during appliance operation.
Expected result: The refrigerator receives treated product water without starving the RO faucet or violating either manufacturer’s requirements.
The benefit is treated water at another outlet. The drawback is added demand: an acceptable faucet flow does not prove the system can also supply an ice maker properly.
Troubleshooting
Water still tests hard at the RO feed
Check that the softener bypass is in its normal service position and that the kitchen branch actually leaves the softened-water line. Confirm the softener has completed startup and is operating correctly before investigating the RO membrane.
The RO faucet produces little water
Check the feed valve, kinked tubing, filter condition, and measured supply pressure against the RO manual. For tank systems, follow the manufacturer’s tank-diagnosis procedure; do not adjust air pressure blindly or add a booster pump without confirming compatibility.
The RO drain keeps running
RO equipment sends water to drain while producing treated water, but persistent discharge after the expected shutoff condition needs investigation. Check the troubleshooting procedure for feed pressure, storage condition, automatic shutoff components, and any permeate or booster pump fitted to that model.
Water appears under the cabinet
Close the RO feed valve and, where fitted, the storage-tank valve. Dry the area and identify the leaking connection before restoring service; isolate the broader supply if water continues escaping.
Drinking water tastes salty after regeneration
Stop using the RO faucet until the cause is identified. Check softener rinsing, bypass routing, and RO performance according to the manuals; ordinary softening exchanges hardness ions, but a pronounced change after regeneration needs investigation rather than reassurance.
Customize your workflow
Build maintenance around the actual water and equipment, not a generic calendar. Keep filter identifiers, feed-water measurements, regeneration settings, and sanitation instructions together. Enter the installation date in 2026 and use each manufacturer’s replacement criteria.
Review your under-sink water filtration options before expanding treatment. Additional filters need a defined purpose; stacking equipment without checking pressure loss and treatment requirements complicates troubleshooting.
Priority Rooter & Plumbing is a licensed plumbing option for Tucson homeowners who need help with a water softener reverse osmosis system combo. Professional plumbing help is appropriate when the installation involves rerouting supply lines, correcting drains, or resolving uncertain connections.
Get help with your plumbing connections
Arrange plumbing help for supply routing, installation, or an uncertain drain connection.
FAQ
Does the water softener go before or after reverse osmosis?
For a conventional whole-house softener feeding an under-sink RO system, the softener goes before the RO feed. Confirm that the softened water meets the exact RO model’s feed-water requirements.
Can I connect reverse osmosis directly to my water softener?
Connect the RO feed to an appropriate softened cold-water supply branch downstream of the softener. Do not connect it to the brine tank, regeneration drain, or an unidentified equipment port.
Does reverse osmosis remove the sodium added by a water softener?
Reverse osmosis reduces dissolved sodium, but the amount depends on the system and operating conditions. Check the specific model’s performance documentation rather than assuming complete removal.
Can a softener and RO system share a drain line?
Do not directly join softener regeneration tubing and RO reject tubing as a shortcut. Each system needs an approved drainage arrangement that follows its instructions and applicable plumbing requirements.
Do I still need an RO system if I have a water softener?
A water softener does not perform the same treatment as reverse osmosis. Choose additional drinking-water treatment based on your water test results and the substances you need to reduce.
Can I feed my refrigerator from an RO system?
Yes, when both manufacturers permit the connection and the RO system meets the refrigerator’s supply requirements. Check delivery pressure, tubing requirements, and filter instructions before adding the branch.
Can I install a softener and RO combo myself?
Only undertake work you can complete safely and in accordance with the equipment instructions and local requirements. Use a licensed plumber when supply routing, drainage, isolation, or required approvals are uncertain.
One last thing
A hardness test and a dissolved-solids test answer different questions. Softened water can still contain dissolved salts, so a dissolved-solids meter is not a reliable substitute for checking whether the softener removed hardness. Confirm the softener’s job before judging the RO system’s performance.